As I sit amidst the scattered components of my latest project, I’m reminded that the notion of a beginner’s guide to building your first custom keyboard often conjures images of daunting complexity. However, I’ve found that the journey to crafting your perfect typing companion is more akin to writing a novel – it requires patience, dedication, and a willingness to learn. The main obstacle for many enthusiasts is not the technical aspect, but rather the overwhelming abundance of information available. I recall my first foray into custom keyboards, where I spent hours poring over tutorials and forums, only to realize that the most valuable lessons came from hands-on experience.
In this article, I promise to cut through the noise and provide practical advice for those embarking on their first custom keyboard adventure. You won’t find any jargon-heavy technical manuals or overly simplistic guides here. Instead, I’ll share my personal experiences, highlighting the key considerations and common pitfalls to avoid when building your first custom keyboard. By the end of this journey, you’ll be equipped with the knowledge and confidence to create a typing experience that’s tailored to your unique needs and preferences. So, let’s dive into the world of custom keyboards and discover the joy of crafting something truly unique.
Table of Contents
- Guide Overview: What You'll Need
- Step-by-Step Instructions
- A Beginners Guide to Building Your First Custom Keyboard
- Finding Inspiration in Keycap Design and Ergonomic Benefits
- Unraveling Custom Keyboard Layouts and Mechanical Switch Types
- The Quill's Picks: 5 Essential Tips for Crafting Your Dream Custom Keyboard
- Key Takeaways for the Aspiring Keyboard Craftsman
- The Art of Creation
- Conclusion: The Key to Unlocking Your Creative Potential
- Frequently Asked Questions
Guide Overview: What You'll Need
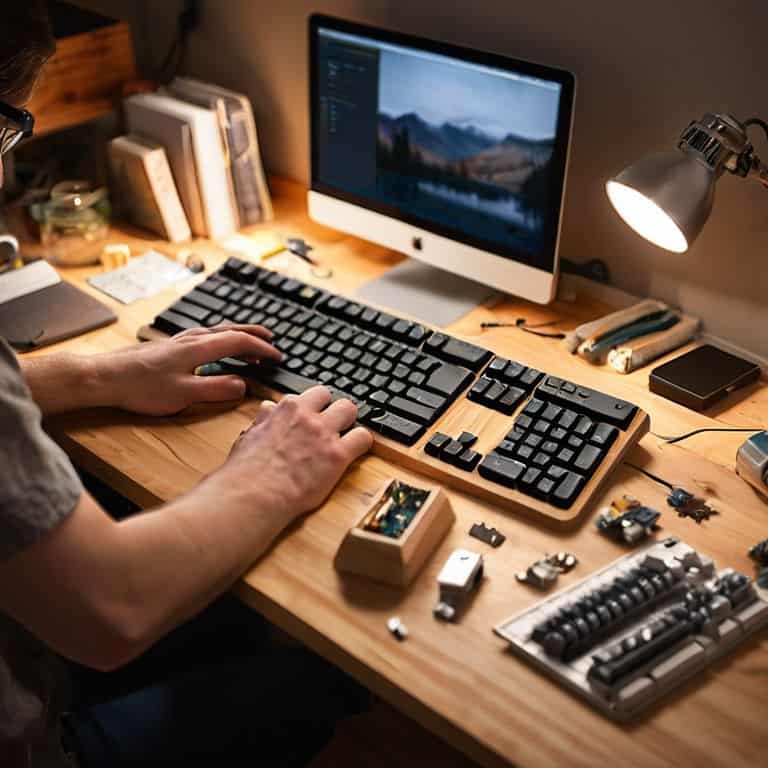
Total Time: 4 hours 30 minutes
Estimated Cost: $100 – $200
Difficulty Level: Intermediate
Tools Required
- Soldering Iron (with a fine tip)
- Wire Cutters (for cutting wires to size)
- Pliers (for gripping small components)
- Utility Knife (with extra blades)
- Drill Press (for making precise holes)
- Sandpaper (for smoothing out rough edges)
Supplies & Materials
- PCB (Printed Circuit Board) (custom-designed for your keyboard layout)
- Switches (choose your preferred switch type)
- Keycaps (select your desired keycap style and material)
- Diodes (for preventing backflow of current)
- Resistors (for regulating voltage)
- Wire (in various colors for organization)
- Hot Glue Gun (for securing components)
- Acrylic or Aluminum Plate (for the keyboard case, approximately 12 inches x 4 inches)
Step-by-Step Instructions
- 1. First, let’s start with the basics of keyboard anatomy, understanding the different components that make up a custom keyboard. This includes the switch types, keycap designs, and the circuit board that brings everything together. As I sit at my desk, surrounded by scraps of paper and half-empty coffee cups, I’m reminded that building a custom keyboard is a process that requires patience, attention to detail, and a willingness to learn.
- 2. Next, we need to choose our tools and materials, which can be a daunting task for beginners. This includes selecting the right switch type, such as linear, tactile, or clicky switches, and deciding on the keycap design and material. I recall spending hours researching and comparing different switch types, finally settling on a combination that suited my typing style and preferences.
- 3. Now, let’s move on to soldering the switches to the circuit board, a step that requires precision and care. This involves applying a small amount of solder to the switch terminals and carefully placing them onto the corresponding pads on the board. As someone who’s still getting the hang of soldering, I can attest that it’s a skill that takes time and practice to develop.
- 4. With the switches soldered in place, it’s time to install the keycaps and start building the keyboard’s layout. This involves placing the keycaps onto the switches, ensuring proper alignment and spacing. I’ve found that using a keycap puller can be incredibly helpful in removing and replacing keycaps, especially when experimenting with different layouts.
- 5. The next step is to connect the keyboard to a computer, which involves installing the necessary software and drivers. This can be a bit tricky, especially for those who are new to custom keyboards, but fortunately, there are many online resources and communities that can provide guidance and support. As I connected my custom keyboard to my laptop for the first time, I felt a sense of excitement and accomplishment.
- 6. Now that our keyboard is up and running, it’s time to customize the layout and settings to our liking. This can involve remapping keys, adjusting the keyboard’s sensitivity, and exploring different macro functions. I’ve spent hours tweaking my keyboard’s settings, experimenting with different layouts and finding the perfect balance between form and function.
- 7. Finally, let’s talk about troubleshooting common issues, such as faulty switches, loose connections, or software glitches. This involves identifying the problem, researching potential solutions, and making adjustments as needed. As a beginner, I’ve encountered my fair share of issues, but with patience and perseverance, I’ve been able to resolve them and enjoy my custom keyboard to its full potential.
A Beginners Guide to Building Your First Custom Keyboard

As I reflect on my journey of building custom keyboards, I realize that one of the most crucial aspects is custom keyboard layouts. The way you design your layout can significantly impact your typing experience. For instance, I opted for a ergonomic layout that allows my hands to rest in a neutral position, reducing strain and fatigue. This design choice has been a game-changer for my writing sessions, which often stretch for hours.
When it comes to mechanical switch types, the options can be overwhelming. I’ve experimented with various switches, from linear to tactile, and each has its unique characteristics. The key is to find the switch that suits your typing style and preferences. I’ve found that keycap design inspiration can also play a significant role in enhancing the overall aesthetic of your custom keyboard. With countless design options available, you can truly make your keyboard a reflection of your personality.
As you embark on your DIY keyboard building journey, it’s essential to tap into the diy keyboard building community. Online forums and social media groups are treasure troves of information, offering valuable tips and tricks from experienced builders. Additionally, custom keyboard software can help you customize your keyboard’s functionality, allowing you to assign macros and create complex key combinations. By exploring these resources, you’ll be well on your way to creating a custom keyboard that meets your unique needs and preferences.
Finding Inspiration in Keycap Design and Ergonomic Benefits
As I delve into the world of custom keyboards, I’m struck by the sheer creativity of keycap design. From sleek, minimalist sets to elaborate, artisanal creations, the options are endless. But beyond aesthetics, ergonomic benefits play a crucial role in the design process. A well-crafted keyboard can make all the difference in reducing fatigue and improving typing efficiency. I recall spending hours typing away on my vintage typewriter, only to realize that the ergonomic benefits of a custom keyboard could have saved me from many a sore finger.
In exploring keycap design, I’ve discovered a fascinating intersection of form and function. Ergonomic considerations, such as finger placement and key travel, can greatly impact the typing experience. By finding inspiration in the unique designs and ergonomic benefits of custom keyboards, builders can create a tailored typing experience that suits their needs.
Unraveling Custom Keyboard Layouts and Mechanical Switch Types
As I delve into the world of custom keyboards, I’m struck by the vast array of layout options and mechanical switch types. It’s a bit like choosing the perfect font for a rare first edition – the difference is subtle, yet profound. From the tactile bump of Cherry MX Browns to the linear smoothness of Kailh Reds, each switch type offers a unique typing experience. And then, of course, there’s the layout: tenkeyless, TKL, or perhaps something more exotic, like a 40% ortholinear design. The choices can be overwhelming, but that’s what makes it so fascinating – the possibility of crafting a keyboard that’s tailored to your individual needs and preferences.
The Quill's Picks: 5 Essential Tips for Crafting Your Dream Custom Keyboard
- As you embark on this journey, remember that patience is a virtue – don’t be afraid to take your time and experiment with different layouts and switch types until you find the perfect fit
- Always keep in mind the ergonomic benefits of your custom keyboard design, as a well-crafted board can make all the difference in your typing comfort and productivity
- Keycap design is an art form, so don’t be shy about expressing your personality through your keycap choices – from sleek and minimalist to bold and statement-making, the options are endless
- When selecting mechanical switches, consider the acoustic and tactile feedback that suits your typing style, whether you prefer a smooth, linear feel or a more pronounced, clicky response
- Lastly, don’t underestimate the importance of a well-planned cable management system – a tidy, organized build can elevate the entire aesthetic and functionality of your custom keyboard, making it a true masterpiece
Key Takeaways for the Aspiring Keyboard Craftsman
As I reflect on my journey of building custom keyboards, I’ve come to realize that the process is just as rewarding as the final product – it’s a journey of discovery, of trial and error, and of refining your tastes and preferences.
With the vast array of custom keyboard layouts and mechanical switch types available, it’s essential to experiment and find the perfect combination that suits your typing style and ergonomic needs – after all, a well-crafted keyboard is an extension of oneself.
Whether you’re drawn to the sleek lines of a minimalist keycap design or the ergonomic benefits of a split keyboard, the world of custom keyboards offers a unique opportunity for self-expression and customization – so don’t be afraid to let your imagination run wild and create a keyboard that truly reflects your personality.
The Art of Creation
Building your first custom keyboard is not just about assembling keys and circuits, it’s about crafting a tool that echoes your touch, a symphony of switches and keycaps that tells a story of its own, one that whispers tales of late night typing sessions, of early morning coding marathons, and of the unwavering pursuit of perfection, one keystroke at a time.
Oliver Quill
Conclusion: The Key to Unlocking Your Creative Potential
As I reflect on our journey through the world of custom keyboards, I’m reminded that the process of building one is not just about assembling components, but about understanding the nuances of custom keyboard layouts and mechanical switch types. It’s about finding inspiration in keycap design and recognizing the ergonomic benefits that a well-crafted keyboard can provide. By following the steps outlined in this guide, you’ve taken the first step towards creating a typing experience that is truly yours, one that reflects your personality and complements your work style. Whether you’re a writer, a coder, or simply someone who appreciates the tactile joy of typing, a custom keyboard can be a game-changer.
As you put the final touches on your custom keyboard, I encourage you to think of it as more than just a tool – think of it as a canvas for self-expression. The world of custom keyboards is full of possibilities, and the journey of creation is just as important as the end result. So, don’t be afraid to experiment, to try new things, and to push the boundaries of what’s possible. With your new custom keyboard by your side, you’ll be unleashing your full creative potential, and that’s a truly exciting prospect.
Frequently Asked Questions
What are the most essential tools I need to get started with building my first custom keyboard?
As I gather my thoughts, I recall the essentials: a soldering iron, wire strippers, and a trusty keyboard PCB. These tools will be your foundation, much like a strong narrative foundation in a novel. Of course, a workbench and some patience won’t hurt either, but with these basics, you’ll be well on your way to crafting your custom keyboard masterpiece.
How do I choose the right mechanical switches for my custom keyboard, considering factors like tactile feedback and sound?
As I ponder the perfect switch, I recall my grandmother’s wisdom: “The right tool can make all the difference.” For me, mechanical switches are about balance – tactile feedback that’s subtle, yet reassuring. I opt for Cherry MX Browns, but ultimately, it’s a personal choice, like selecting the perfect font for my vintage typewriter. Experiment, and let your fingers be the judge.
Are there any specific keycap designs or ergonomic considerations that can enhance the overall typing experience on a custom keyboard?
As I ponder the perfect keycap, I find that sculpted profiles and ergonomic designs can indeed elevate the typing experience. Consider keycaps with subtle curvature and tactile bumps to guide your fingers, or explore split, ortholinear, or curved keyboards for improved hand alignment and reduced strain.