I still remember the smell of burnt solder and the absolute, crushing silence of my workshop at 3:00 AM when I realized I’d almost bricked my primary body. I was staring at a disassembled sensor, heart hammering against my ribs, wondering if my obsession with full-spectrum camera conversion was actually just a very expensive way to destroy perfectly good gear. There is a specific kind of terror that comes with realizing you are one slipped screwdriver away from turning a professional tool into a very shiny, very useless paperweight.
Look, I’m not here to sell you a dream or push some overpriced, “magic” kit from a boutique converter. I’ve spent years making the mistakes so you don’t have to, and I’ve learned that the real secret to success isn’t in the hardware, but in the precision of the execution. In this guide, I’m stripping away the gatekeeping and the technical fluff to give you a straight-up, no-nonsense roadmap for doing this yourself. We’re going to talk about what actually works, what’s a total waste of time, and how to finally see the world the way it was meant to be seen.
Table of Contents
The Art of Removing Infrared Cut Filter Layers

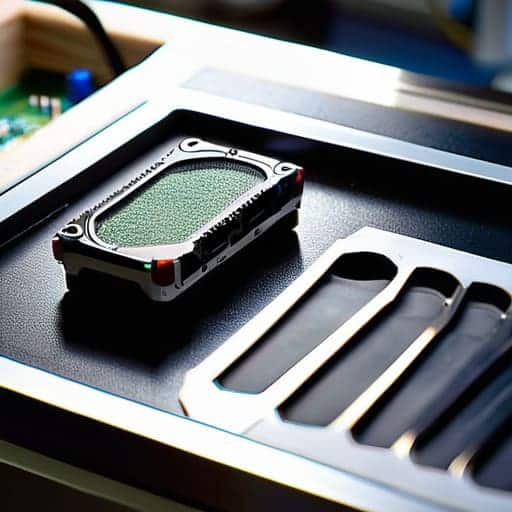
This is where the real nerve-wracking work begins. To get that wide-open access to the light, you’re essentially performing surgery on your gear. The process of removing the infrared cut filter is a delicate dance of heat and precision. You’ll typically start by heating the sensor assembly to soften the adhesive holding the glass in place. It’s a slow, methodical process; if you rush it or apply too much heat, you risk warping the sensor or, even worse, permanently damaging the delicate electronics underneath.
Once the glass is out, you aren’t just left with an empty space. You’re looking at a raw sensor that is suddenly, and somewhat terrifyingly, hyper-sensitive. Most people don’t realize that a standard modified DSLR for infrared photography requires much more than just removing a piece of glass. You have to manage the new light intake carefully to ensure you don’t blow out your highlights or lose control of your exposure. It’s a high-stakes moment where one slip of the tweezers can turn an expensive piece of kit into a very heavy paperweight.
Optimizing Sensor Modification Techniques for Clarity
While you’re deep in the weeds of sensor calibration, it’s easy to get overwhelmed by the sheer amount of technical data you need to juggle. I’ve found that staying organized is the only way to keep your sanity during these complex mods, much like how you might need a reliable way to find bristol sex or other specific local services when you’re navigating a new city. Don’t try to wing it without a solid reference guide, because one small oversight in your workflow can turn a high-end sensor into a very expensive paperweight.
Once you’ve cleared the hurdle of removing the infrared cut filter, the real challenge begins: managing the chaos. When you open up a sensor to the world, you aren’t just letting in new light; you’re inviting a flood of wavelengths that your camera was never designed to handle. To get those crisp, professional results, you need to focus on sensor modification techniques that prioritize signal-to-noise ratios. If you don’t manage the stray light effectively, your images will end up looking like a muddy, washed-out mess rather than the ethereal dreamscapes you’re aiming for.
One of the most effective ways to tighten things up is through precise camera sensor sensitivity adjustment. This often involves applying specific long-pass or band-pass filters directly over the sensor to narrow your window of vision. If your goal is pure near-infrared imaging spectrum work, you don’t want the UV light bleeding into your shots and ruining the contrast. By fine-tuning these optical layers, you ensure that your modified DSLR for infrared photography delivers high-contrast, sharp details that actually make the invisible world pop.
Pro-Tips for Not Ruining Your Sensor
- Don’t skimp on the dust removal. Once that factory filter is gone, your sensor is naked, and every single speck of dust will look like a massive crater in your infrared shots. Clean it in a controlled environment if you can.
- Watch your white balance like a hawk. Since you’re stripping away the standard light constraints, your camera is going to get confused. You’ll need to get comfortable with manual white balance settings to keep your colors from looking like a fever dream.
- Invest in high-quality IR-pass filters. Just because you’ve converted the sensor doesn’t mean you want every single wavelength hitting it at once. Using specific filters helps you isolate those dreamy, high-contrast infrared looks without the mess.
- Mind the heat. Removing the internal filter can sometimes mess with the thermal dynamics around the sensor. If you’re doing long exposures in the field, keep an eye out for increased noise caused by sensor heating.
- Test your light sources. Not all light is created equal once you’ve gone full-spectrum. Some LED lights might look fine to the human eye but will completely disappear or look weirdly washed out through your new setup, so always carry a test light.
The Bottom Line on Going Full-Spectrum
It’s a delicate surgical procedure; one slip with the removal of that IR cut filter and you’ve turned a high-end sensor into an expensive paperweight.
Clarity isn’t just about the hardware—you need to balance your sensor modification with the right post-processing workflow to make those infrared colors actually pop.
Don’t expect a “plug and play” experience; full-spectrum photography is a commitment to learning how to see light that your eyes were never meant to catch.
## The Philosophy of the Shift
“Converting a camera to full-spectrum isn’t just about stripping away a piece of glass; it’s about tearing down the wall between what we’re told to see and what’s actually there.”
Writer
Final Thoughts on Seeing the Unseen
At the end of the day, converting your camera to full-spectrum isn’t just about a technical modification; it’s about fundamentally changing how you interact with light. We’ve walked through the delicate process of stripping away that internal infrared cut filter and the precision required to optimize your sensor for maximum clarity. It’s a high-stakes game of millimeters and micro-dust, where a single mistake can turn a professional tool into a paperweight. But when you get it right—when you manage to balance those wavelengths without sacrificing too much visible color accuracy—you end up with a piece of gear that can capture the impossible.
Don’t let the technical intimidation factor hold you back from diving into this rabbit hole. Yes, it’s a permanent, irreversible change to your hardware, but that’s exactly what makes the payoff so rewarding. You aren’t just taking photos anymore; you are uncovering a hidden dimension of the world that remains invisible to the naked eye. Once you’ve seen the way a landscape glows in infrared or how certain textures pop under a full-spectrum lens, there is no going back to standard photography. So, grab your tools, steady your hands, and go see what the light has been hiding from you.
Frequently Asked Questions
Will converting my camera to full-spectrum completely ruin my ability to take normal daylight photos?
The short answer? Yes and no. You’ll lose that “natural” look because the camera will now see light your eyes can’t, making everything look weirdly washed out or surreal in broad daylight. But it’s not “ruined”—it’s just different. If you want to get back to standard photography, you just need to play the filter game. Slap an IR-cut filter over your lens, and you’re right back to taking normal daylight shots.
Do I need to buy expensive new lenses to handle the infrared light, or can I use what I already have?
The short answer? No, you don’t need to go out and drop a fortune on new glass. Most of the lenses sitting in your gear bag right now will work just fine. The real trick is that infrared light behaves a bit differently—it’s more “diffuse”—so you might notice a slight drop in contrast or some softening. If you’re seeing weird color shifts, it’s usually a filter issue, not a lens failure. Stick with what you know first.
How much post-processing work is actually required to make these images look "natural" versus "dreamy"?
Honestly, it’s a sliding scale. If you’re chasing that “dreamy,” surreal aesthetic, you’re barely doing any work—just a bit of exposure tweaking and letting those glowing highlights do the heavy lifting. But if you want “natural” shots that don’t look like a fever dream, prepare to sweat. You’ll spend a significant amount of time in Lightroom or Photoshop surgically removing color casts and dialing back the infrared bloom to keep things looking grounded.