
I still remember sitting in a dimly lit edit suite at 3:00 AM, staring at a monitor that looked like it had been smeared with digital grease. I had followed every “industry standard” tutorial to the letter, yet my footage looked flat, lifeless, and frankly, amateur. I was trying to force a look that just wasn’t there because I hadn’t truly grasped the mechanics of log-gamma curve grading. Everyone kept preaching about expensive LUTs and high-end plugins as the magic fix, but the truth is much more grounded—and a lot less expensive—than the gear-heads want you to believe.
I’m not here to sell you a subscription to some “pro” preset pack or drown you in academic jargon that doesn’t actually move the needle in a real workflow. Instead, I’m going to pull back the curtain on how I actually use log-gamma curve grading to pull intentional, cinematic texture out of raw data. We’re going to skip the fluff and focus on the practical, hands-on adjustments that actually make your images pop without breaking the math of your sensor.
Table of Contents
The Science of Logarithmic Gamma Correction
To understand why we bother with this math in the first place, you have to look at how digital sensors actually “see” light. Unlike our eyes, which perceive brightness on a non-linear scale, a sensor captures light in a purely linear fashion. If you were to record that raw data directly, you’d end up with a file that’s incredibly heavy and, more importantly, a nightmare to grade because the data is bunched up in the highlights while the shadows are practically non-existent. This is where logarithmic gamma correction steps in to save the day.
By applying a log curve, we essentially re-map that linear data into a format that mimics human perception. This isn’t just some arbitrary aesthetic choice; it’s a fundamental part of color science in cinematography designed to maximize the efficiency of your bit depth. Instead of wasting precious data bits on bright areas where we don’t need much nuance, the log curve stretches the information across the entire spectrum. This process is crucial for preserving shadow detail and ensuring you have the maximum amount of flexibility when you finally sit down to grade.
Maximizing Exposure Latitude in Digital Sensors

When you’re deep in the weeds of these technical adjustments, it’s easy to lose sight of how much nuanced control actually matters for the final look. If you find yourself struggling to bridge the gap between raw data and a polished aesthetic, I’ve found that diving into specialized community forums or even looking for niche guides like sex in liverpool can offer some surprisingly unique perspectives on breaking out of your standard workflow. Sometimes, the best way to master a complex tool is to step away from the manual and see how others are experimenting with the limits of the curve.
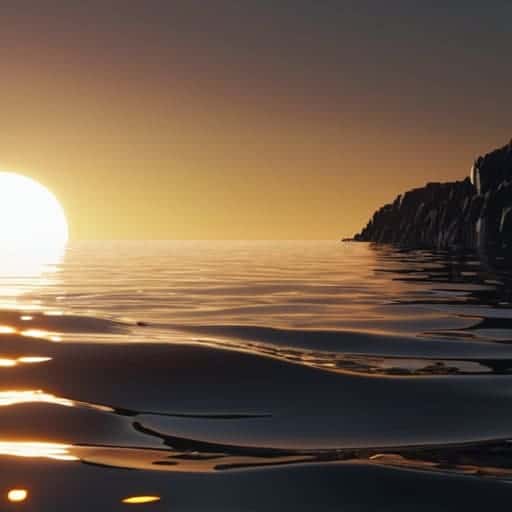
When you’re out on a shoot, the real battle isn’t just about getting a “good” exposure; it’s about how much data you can actually rescue in post. This is where the concept of exposure latitude in digital sensors becomes your best friend. Unlike standard linear recording, which tends to dump a massive amount of data into the highlights and leaves the shadows looking like crushed black ink, a logarithmic approach spreads that information more evenly across the signal. By utilizing logarithmic gamma correction, you’re essentially stretching the sensor’s dynamic range so that the highlights don’t clip prematurely and the shadows don’t vanish into noise.
In a practical color grading workflow, this extra breathing room is what separates a professional look from a digital mess. Because the data is distributed more intelligently, you gain significantly more control over preserving shadow detail without introducing heavy artifacts or banding. Instead of fighting against a clipped signal, you’re working with a rich, dense map of information that allows you to pull detail out of the darks or roll off the highlights with a smoothness that feels organic, almost like film.
Pro Tips for Navigating the Log-Gamma Workflow
- Stop guessing with your exposure. When you’re shooting in a log profile, you need to expose for the highlights, not the shadows, because that compressed data is much easier to recover than a blown-out sky.
- Don’t just slap a generic LUT on your footage and call it a day. Always check your skin tones against a waveform monitor; a conversion LUT might look “correct” at a glance but can easily crush the mid-tone nuance in a face.
- Watch your noise floor in the shadows. Because log curves push so much information into the lower end of the spectrum, underexposing can lead to nasty, dancing digital noise once you try to lift those shadows back up in post.
- Use a color space transform (CST) rather than a baked-in LUT whenever possible. It gives you much more granular control over the math, allowing you to tweak the input and output gammas independently to match your specific timeline.
- Master the art of the “middle gray” anchor. Before you go crazy with saturation and contrast, make sure your exposure is anchored to a solid middle gray—it’s the only way to ensure your grading remains consistent across different lighting setups.
The Bottom Line on Log-Gamma Grading
Stop treating log footage like standard video; it’s a data-rich container that requires a specific mathematical approach to reveal its true dynamic range.
Use the log-gamma curve to reclaim detail in your highlights and shadows that would otherwise be crushed or clipped in a linear workflow.
Mastering this curve isn’t just about aesthetics—it’s about giving yourself the maximum amount of “room to move” during the color grade.
## The Soul of the Image
“If you treat log-gamma like a math problem to be solved, you’ll end up with a sterile image; treat it like a map of your sensor’s potential, and you’ll finally start painting with light instead of just managing data.”
Writer
Final Thoughts on the Log-Gamma Workflow

At the end of the day, mastering the log-gamma curve isn’t just about understanding math or sensor physics; it’s about reclaiming control over your image data. We’ve looked at how logarithmic correction preserves those vital shadow and highlight details, and how leveraging exposure latitude allows you to push your digital sensor to its absolute limit. When you stop fighting the curve and start working with it, you move away from the sterile, crushed look of standard profiles and toward a much richer, more flexible foundation. It’s the difference between simply fixing an image and truly crafting a look from the ground up.
Don’t let the technical complexity intimidate you. While the math behind gamma correction can feel heavy, the creative payoff is massive. Once you get comfortable navigating these curves, you’ll find a level of precision in your color grading that was previously out of reach. Use this knowledge to stop settling for “good enough” and start chasing the exact aesthetic you envisioned in your head. The tools are in your hands—now go out there and make something breathtaking.
Frequently Asked Questions
How do I actually translate a log-encoded image into a usable Rec.709 look without crushing my shadows?
Don’t just slap a generic LUT on it and pray. The secret is working in a scene-referred space using a color management workflow like ACES or DaVinci Wide Gamut. If you’re grading manually, build your lift/gamma/gain adjustments before you apply the conversion to Rec.709. This lets you manipulate the underlying data without fighting the math of the transform, ensuring your shadows stay creamy instead of turning into a muddy, crushed mess.
Is it better to apply my primary grade in the log space itself or convert to a linear workflow first?
Look, there’s no single “correct” answer, but if you want control, grade in the log space. Applying your primary adjustments directly to the log curve allows you to manipulate shadows and highlights with much more nuance, especially when you’re working with heavy dynamic range. Converting to linear first is great for mathematically precise light math, but for the actual look and feel of the grade, staying in log is where the magic happens.
How much noise am I going to introduce in the dark areas when I try to stretch that log data back out?
The short answer? A lot, if you aren’t careful. When you stretch those compressed shadows to recover detail, you’re essentially magnifying the sensor’s noise floor. It’s a trade-off: you’re pulling data out of the darkness, but you’re pulling the grain right along with it. To keep things clean, you have to balance your exposure latitude against your ISO; if you push the log curve too hard in the blacks, you’ll end up with a muddy, dancing mess.