I still remember the first time I held a 3D printed model of the Orion Nebula in my hands – it was as if I had bottled a piece of the cosmos. As a virtual reality developer with a passion for stargazing, I’ve always been fascinated by the intersection of technology and the natural world. That’s why I’m excited to share my journey with you in this guide to 3D printing, where we’ll explore the endless possibilities of creating complex objects with precision and ease.
In this article, I promise to cut through the hype and provide you with practical advice on how to get started with 3D printing, from choosing the right materials to troubleshooting common issues. Whether you’re a seasoned maker or just starting out, my goal is to empower you with the knowledge and skills to bring your most ambitious projects to life. So, if you’re ready to unlock the full potential of 3D printing and join me on this journey of discovery, let’s dive in and explore the vast frontier of a guide to 3D printing together.
Table of Contents
Guide Overview: What You'll Need
Total Time: 5 hours 30 minutes
Estimated Cost: $500 – $1000
Difficulty Level: Intermediate / Hard
Tools Required
- 3D Printer (with heated bed and extruder)
- Computer (with 3D modeling software)
- Calipers (for measuring model dimensions)
- Level (for ensuring printer is level)
- Pliers (for removing supports)
- Screwdriver (for assembling and adjusting printer)
Supplies & Materials
- 3D Printing Filament (available in various colors and materials)
- Print Bed Adhesive (such as boron carbide or glue stick)
- Support Material (such as soluble support or breakaway support)
- 3D Modeling Software (such as Blender or Fusion 360)
- Power Supply (for powering the 3D printer)
- Ventilation System (for removing fumes and particles)
Step-by-Step Instructions
- 1. To begin our journey into the world of 3D printing, assemble your 3D printer according to the manufacturer’s instructions. This might seem like a straightforward step, but it’s crucial to ensure that every component is correctly placed and secured to avoid any issues down the line. I recall my first project, named after the constellation of Andromeda, where I spent hours calibrating my printer to get the perfect print.
- 2. Once your printer is assembled, it’s time to choose your printing material. There are several types of filaments available, each with its unique characteristics, such as PLA, ABS, and PETG. For beginners, I recommend starting with PLA, as it’s easy to work with and produces minimal warping. Remember, the right filament can make all the difference in the quality of your print, much like how the right star chart can help you navigate through the night sky.
- 3. Now, let’s move on to designing your 3D model. You can either create your own model from scratch using software like Blender or Tinkercad or download pre-made models from online repositories. If you’re new to 3D modeling, I suggest starting with simple shapes and gradually moving on to more complex designs. My project, Rigel, was a challenging but rewarding experience, as it pushed me to learn advanced modeling techniques.
- 4. With your model ready, it’s time to slice your design into layers that your printer can understand. Slicing software like Cura or Slic3r will help you prepare your model for printing by generating G-code that the printer can execute. This step is critical, as it determines the print quality and speed. Be patient, as slicing can take some time, especially for complex models like my Orion Nebula project.
- 5. Next, configure your print settings to achieve the desired level of detail and speed. This includes adjusting parameters like layer height, infill density, and support material. It’s essential to find the right balance between print time and quality, as higher quality prints often require more time. Don’t be afraid to experiment with different settings to find what works best for your specific model and printer.
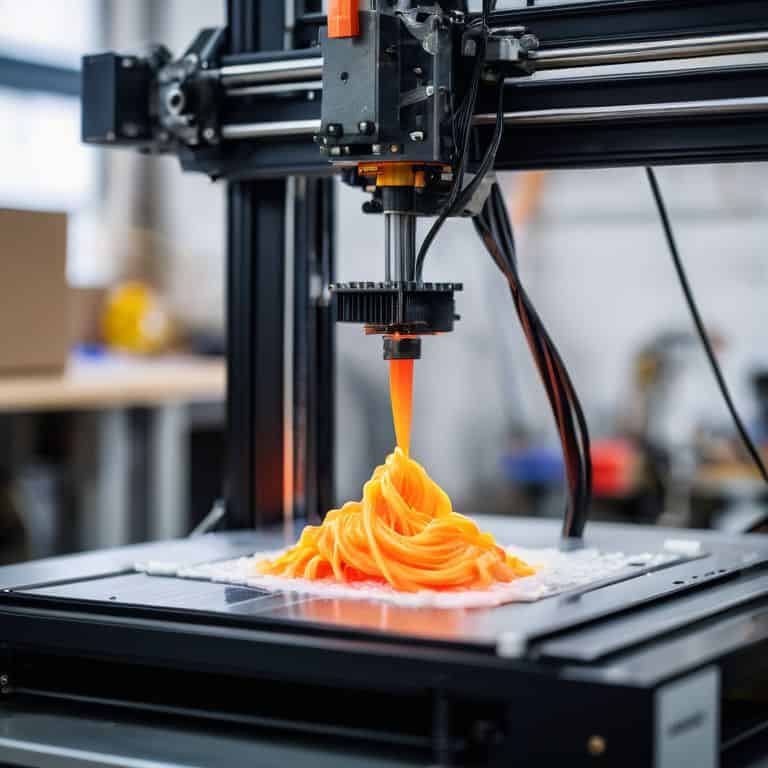
- 6. Now that your model is sliced and settings are configured, it’s time to start the printing process. Make sure your printer is properly calibrated, and the printing area is clear of any debris. As the print begins, you’ll see your model take shape, layer by layer. This is the most exciting part of the process, as you get to see your virtual creation become a physical reality.
- 7. After the print is complete, remove and clean up the model. This may involve removing support material, sanding rough edges, and applying a finish to protect the model. Be gentle, as 3D printed models can be fragile, especially if they have intricate details. With your model now complete, you can admire your handiwork and plan your next project, perhaps one that’s inspired by the majestic swirl of the Milky Way.
A Guide to 3d Printing
As I delve into the world of 3D printing, I’m reminded of my virtual reality project, Andromeda’s Gate, where I crafted a stunning celestial landscape. Similarly, when it comes to 3D printing for hobbyists, it’s essential to consider the introduction to 3D modeling and choose the right software to bring your ideas to life. I’ve found that choosing the right 3D printer can make all the difference in the quality of your prints.
When working with 3D printing, safety precautions are crucial to avoid accidents and ensure a smooth printing process. It’s also important to be aware of common 3D printing mistakes, such as incorrect temperature settings or insufficient calibration, to achieve the best results. By understanding these factors, you can optimize your printing experience and create stunning models that rival the stars.
As you explore the world of 3D printing, it’s essential to conduct a 3D printing cost analysis to understand the financial implications of your projects. By considering the cost of materials, printer maintenance, and energy consumption, you can make informed decisions about your printing endeavors and create complex objects that are both visually stunning and cost-effective.
Introduction to Cosmic Crafting
As I delve into the realm of 3D printing, I find myself drawn to the endless possibilities it offers. Cosmic crafting, to me, is about bringing the wonders of the universe down to earth, literally. With each new project, I feel like I’m holding a star in the palm of my hand, shaping and molding it into something tangible. My latest obsession, a 3D printed model of the Andromeda galaxy, has me mesmerized. The intricate details, the swirling clouds of gas and dust, all recreated with precision and care.
This cosmic crafting journey has not only deepened my understanding of 3D printing but also rekindled my passion for stargazing. I’ve begun to name my projects after obscure constellations, like “Rigel’s Reach” and “Nebula Nexus.” It’s a quirky habit, but one that reminds me of the magic that happens when technology meets imagination. As I explore the frontiers of 3D printing, I’m excited to see where this cosmic crafting journey takes me, and what wonders I’ll create along the way.
Navigating 3d Modeling Frontiers
As I delve into the realm of 3D modeling, I find myself drawn to the limitless expanse of digital landscapes, much like the celestial seas I’ve always been fascinated by. My latest project, “Nebula’s Edge,” is a testament to this – a virtual reality world where users can explore intricate, starry nightscapes and craft their own cosmic wonders. The process of creating such immersive experiences has taught me the importance of precision and creativity in 3D modeling. With each new model, I feel as though I’m naming a new constellation, bringing a piece of the universe to life.
In this frontier, the boundaries between reality and fantasy blur, and the possibilities become endless. I’ve found that 3D modeling software has become my trusty telescope, allowing me to zoom in on the smallest details and zoom out to see the grand tapestry of my creations. Whether I’m crafting a model of a distant planet or designing a futuristic spacecraft, the thrill of exploration and discovery is always present.
Stellar Printing Secrets: 5 Cosmic Tips to Elevate Your 3D Crafting
- Embrace the Dark Side of the Moon: Understanding the Importance of Proper Ventilation in Your 3D Printing Workspace
- Gravitational Pull: How to Optimize Object Placement for Successful Prints, Inspired by the Celestial Ballet of the Planets
- Starlight Serenity: The Role of Ambient Lighting in Enhancing Your 3D Printing Experience, from Constellation-Inspired Colors to Galactic Glow
- Aurora Alerts: Mastering the Art of Real-Time Monitoring for a Smoother 3D Printing Journey, with Notifications as Timely as a Shooting Star
- Black Hole Brilliance: Harnessing the Power of Post-Printing Techniques to Add an Extra Layer of Depth and Dimension to Your Cosmic Creations, Making Them Shine Like a Supernova
Stellar Insights: 3 Key Takeaways from Our Cosmic Crafting Journey
Embracing the fusion of technology and celestial wonder, we can unlock new dimensions in 3D printing, where the boundaries of space and innovation blur.
With the right mindset and tools, crafting models of distant planets and galaxies becomes not just a hobby, but a gateway to understanding the intricacies of our universe and the limitless potential of human creativity.
By venturing into the frontiers of 3D modeling and printing, we open ourselves to a future where holding a star in the palm of our hand is no longer a metaphor, but a tangible reality that inspires generations to reach for the cosmos.
Cosmic Insights
As we navigate the vast expanse of 3D printing possibilities, remember that the true magic lies not in the technology itself, but in the celestial landscapes it allows us to create – where the boundaries of reality are but a distant star on the horizon.
Roy Barratt
Embracing the Cosmic Frontier
As we conclude this journey through the frontiers of 3D printing, it’s essential to reflect on the key takeaways. We’ve navigated the introduction to cosmic crafting, explored the basics of 3D modeling, and delved into the step-by-step process of bringing celestial wonders to life. By mastering these skills, you’ll be well on your way to creating stunning, otherworldly models that inspire and awe. Whether you’re a seasoned developer or an enthusiastic newcomer, the world of 3D printing offers a limitless canvas for creativity and innovation.
As you embark on your own cosmic crafting adventures, remember that the true magic lies not in the technology itself, but in the boundless imagination it unlocks. So, let your curiosity soar, and reach for the stars. For in the infinite expanse of the digital universe, every project is a chance to name a new constellation, to forge a fresh path, and to inspire others to join you on this extraordinary journey. The future of 3D printing is bright, and with passion, creativity, and a willingness to explore, the possibilities are truly endless.
Frequently Asked Questions
What are the most essential skills to learn for a beginner in 3D printing?
As a beginner, I’d say the most essential skills to learn are designing with CAD software, understanding 3D modeling fundamentals, and mastering slicing techniques – it’s like navigating a virtual galaxy, where each skill is a constellation to explore, and I’ve named my favorite project after the star ‘Rigel’ to remind me of the endless possibilities.
How can I choose the right 3D printing material for my cosmic crafting project?
For my project, ‘Rigel’s Reach,’ I opted for a metallic-infused filament that shimmered like stardust, perfectly capturing the essence of a distant nebula. When choosing materials, consider the celestial theme, desired texture, and durability – it’s all about bringing your cosmic vision to life, one carefully selected filament at a time.
What are some common challenges to expect when navigating 3D modeling frontiers for the first time?
As I ventured into 3D modeling, I encountered challenges like wrestling with intricate designs and troubleshooting pesky software glitches – but naming my projects after constellations, like “Andromeda’s Gate,” helped me stay inspired and push through the tough spots, just like navigating a spaceship through uncharted asteroid fields.