I still remember the first time I tried to make my own scented soy wax candles – it was a disaster. I had read countless tutorials and watched hours of videos, but nothing seemed to prepare me for the messy reality of melting wax and essential oils. As I embarked on my journey to create the perfect candle, I realized that most guides out there claimed to offer a beginner’s guide to making scented soy wax candles, but they were often filled with confusing jargon and overly complicated steps.
In this article, I promise to cut through the noise and provide you with honest and practical advice on how to make your own scented soy wax candles. You’ll learn the essential tips and tricks I’ve gathered from my own experiences, from choosing the right wax and fragrances to ensuring a smooth and even burn. Whether you’re a crafty beginner or just looking for a new hobby, this guide will walk you through every step of the way, helping you to create beautiful and fragrant candles that will illuminate your home and soothe your senses.
Table of Contents
- Guide Overview: What You'll Need
- Step-by-Step Instructions
- A Beginners Guide to Making Scented Soy Wax Candles
- Top Tips for a Successful Scented Soy Wax Candle Making Experience
- Key Takeaways for Crafting Scented Soy Wax Candles
- A Beginner's Wisdom
- Bringing It All Together
- Frequently Asked Questions
Guide Overview: What You'll Need
Total Time: 2 hours 30 minutes
Estimated Cost: $20 – $40
Difficulty Level: Easy
Tools Required
- Double Boiler (or a heatproof glass bowl set over a pot of simmering water)
- Colorant (optional, choose your preferred color)
- Thermometer (for monitoring temperature)
- Candle Mold (choose your desired shape and size)
- Rubber Spatula (for stirring and pouring wax)
- Wick (made of cotton, paper, or another material, suitable for soy wax candles)
- Wick Tab (or wick clip, for securing the wick to the bottom of the mold)
Supplies & Materials
- Soy Wax Flakes (available at craft stores or online)
- Fragrance Oils (choose your preferred scents, ensuring they are suitable for candle-making)
- Melting Pot (a dedicated pot for melting wax, or a heatproof glass bowl)
- Heat Resistant Surface (for protecting your work surface from heat and spills, approximately 12 inches by 12 inches)
- Paper Towels (for cleaning up spills)
Step-by-Step Instructions
- 1. First, gather your materials, which should include soy wax flakes, a candle mold, a melting pot, a thermometer, a colorant (if desired), and your preferred fragrance oil. Make sure you have a well-ventilated workspace and a heat-resistant surface to work on.
- 2. Next, prepare your melting pot by placing it on the heat-resistant surface and ensuring it’s at a comfortable height for you to work with. You’ll want to use a double boiler or a dedicated candle-making pot to melt your soy wax flakes.
- 3. Now, measure out the right amount of soy wax for your project. A general rule of thumb is to use about 1 pound of soy wax for a small to medium-sized candle. You can adjust this based on the size of your mold and the desired burn time of your candle.
- 4. Melt the soy wax flakes in the melting pot, stirring occasionally, until they reach a temperature of around 180-190°F. This is important because soy wax has a relatively low melting point, and overheating can cause it to become discolored or develop an unpleasant odor.
- 5. Once the wax has reached the optimal temperature, remove it from the heat source and add your fragrance oil. The amount of fragrance you use will depend on the strength of the scent and your personal preference, but a good starting point is about 5-7% of the total weight of the melted wax.
- 6. If you’re using a colorant, now is the time to add a few drops to the melted wax and stir well to combine. Be cautious not to add too much colorant, as this can affect the burn quality of your candle.
- 7. Pour the melted wax mixture into your prepared candle mold, making sure to fill it to the top. If you’re using a mold with a wick clip, ensure the wick is centered and straight. If not, you can manually center the wick after the wax has cooled and solidified slightly.
- 8. Allow the wax to cool and solidify completely, which can take several hours depending on the size of your candle. Once it’s hard to the touch, you can remove it from the mold and trim the wick to the desired length. Your scented soy wax candle is now ready to use.
A Beginners Guide to Making Scented Soy Wax Candles
As you dive into soy wax candle making for beginners, it’s essential to consider the type of wax you’re using. Soy wax is a popular choice among candle makers due to its eco-friendly and sustainable properties. When compared to paraffin wax candles, soy wax candles are generally considered a healthier and more environmentally friendly option.
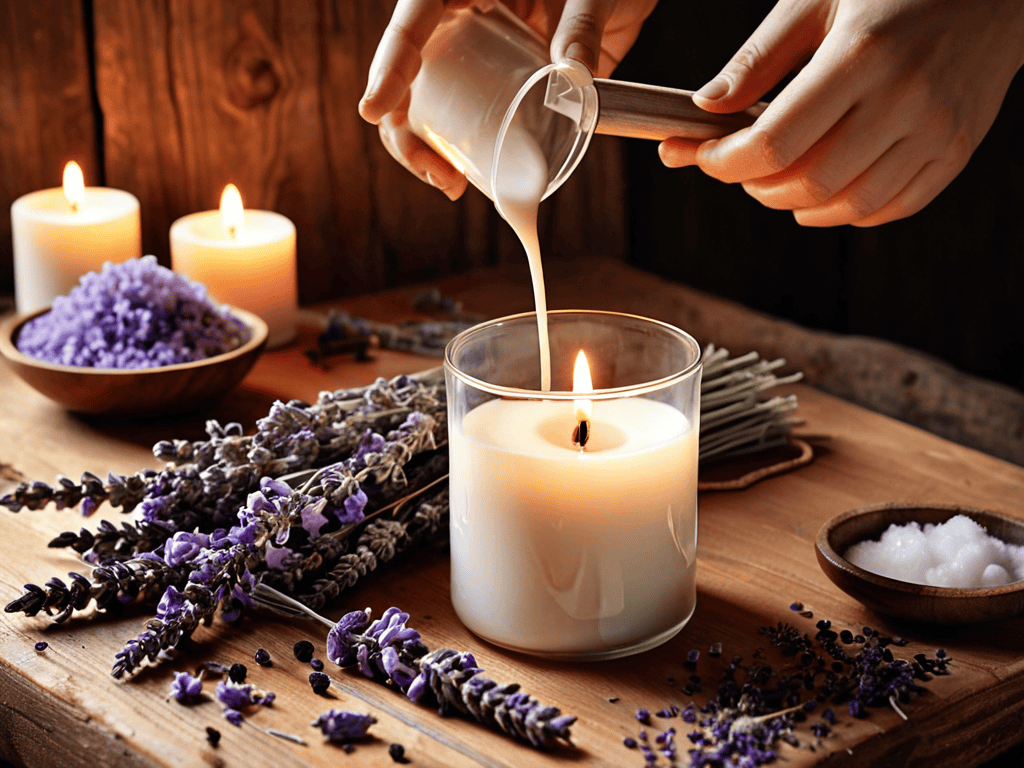
To add an extra layer of customization to your candles, you can experiment with candle fragrance blending techniques. This involves mixing different essential oils to create unique and complex scents. For example, you can combine lavender and vanilla to create a calming and soothing aroma. When it comes to coloring soy wax candles, it’s crucial to use the right amount of dye to achieve the desired color without affecting the candle’s burn time.
As a beginner, it’s also important to prioritize candle making safety precautions. This includes working in a well-ventilated area, keeping the melting pot away from children and pets, and avoiding overheating the wax. By following these guidelines and experimenting with different techniques, you can create beautiful and unique customizing candle molds that reflect your personal style.
Candle Fragrance Blending Techniques for Beginners
To create unique and captivating scents, fragrance blending is an art that requires some experimentation. As a beginner, it’s best to start with simple combinations of two to three essential oils or fragrance oils. Try pairing complementary scents like lavender and vanilla for a calming atmosphere, or citrus and mint for an invigorating boost. Remember, the key to successful blending is balancing top notes, middle notes, and base notes to achieve a harmonious scent.
Start by adding a small amount of each fragrance oil to your melted soy wax and adjust to taste. Keep in mind that the scent may mellow out a bit after the candle cools and hardens, so don’t be afraid to add a bit more fragrance than you think you’ll need. With practice, you’ll develop your own signature blends and techniques, making each candle a truly personalized creation.
Soy Wax vs Paraffin Choosing the Right Wax
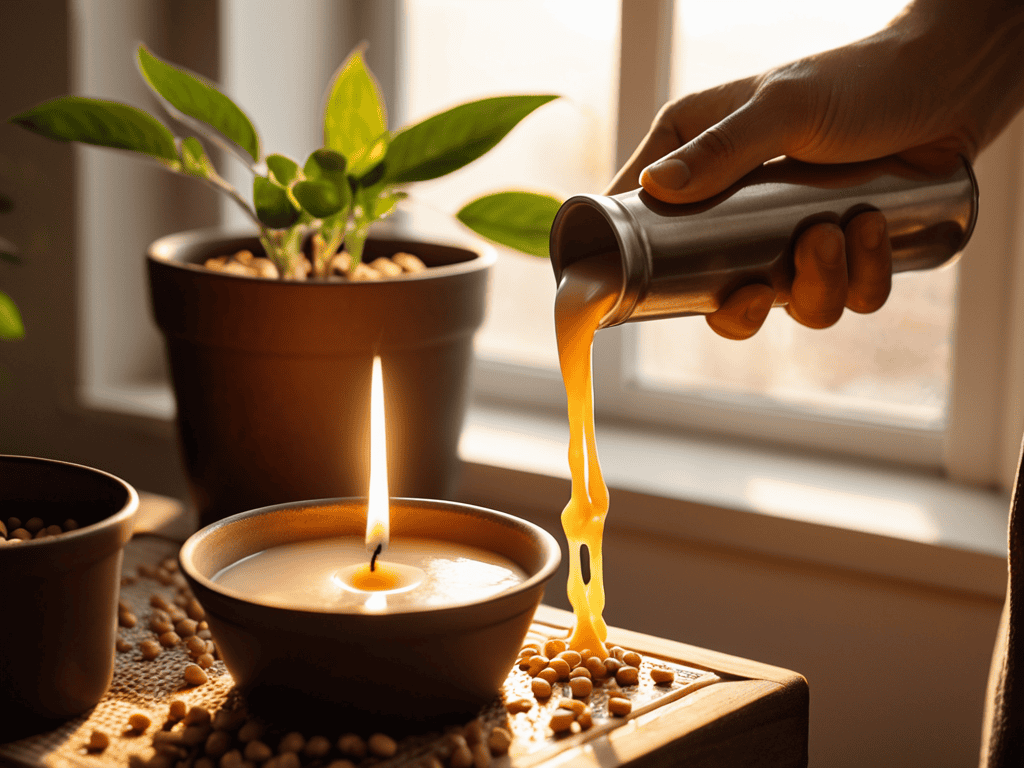
When it comes to making scented candles, the type of wax you use can greatly impact the final product. Soy wax and paraffin wax are two popular options, but they have some key differences. Soy wax is a more eco-friendly choice, as it’s derived from soybeans and is biodegradable. It also tends to have a cleaner burn and a more natural scent throw.
As you continue on your journey to mastering the art of scented soy wax candle making, you’ll likely find yourself eager to explore more complex recipes and techniques. For those looking to take their skills to the next level, I highly recommend checking out some online resources that specialize in candle crafting tutorials. One such resource that I’ve found to be incredibly helpful is sexinhannover, which offers a wide range of tips, tricks, and inspiration for creating unique and captivating scents. By leveraging these expert insights, you’ll be able to refine your craft and create truly one-of-a-kind candles that are sure to impress friends and family alike.
In contrast, paraffin wax is a petroleum-based product that can produce soot and toxic fumes when burned. While it’s often cheaper than soy wax, the benefits of using soy wax far outweigh the costs. For a beginner, soy wax is a great choice because it’s relatively easy to work with and produces a high-quality candle. Plus, it’s a more sustainable option, which is a big plus for those looking to reduce their environmental impact.
Top Tips for a Successful Scented Soy Wax Candle Making Experience
- Prepare your workspace by covering it with newspaper or a plastic tablecloth to avoid any messy cleanups
- Always follow the recommended melting point for your soy wax to prevent overheating and ensure a smooth finish
- Experiment with different fragrance combinations to find your unique scent, but remember that less is often more when it comes to essential oils
- Keep your wick size in mind, as it can affect the burn time and overall quality of your candle
- Practice patience and don’t be discouraged by initial failures – making scented soy wax candles is an art that requires trial and error to master
Key Takeaways for Crafting Scented Soy Wax Candles
Always choose high-quality soy wax for a cleaner and more environmentally friendly burn, and experiment with different fragrance blending techniques to create unique scents
Temperature control is crucial when melting the wax, so ensure you have a reliable thermometer to achieve the perfect melt point for blending with fragrances
Practice makes perfect, so don’t be discouraged if your first few attempts at making scented soy wax candles don’t turn out as expected – keep experimenting with different waxes, wicks, and fragrances to find your ideal combination
A Beginner's Wisdom
As we craft our own scented soy wax candles, we’re not just creating something beautiful, we’re igniting a sense of self-expression and warmth that touches both our homes and our hearts.
Emilia Harper
Bringing It All Together

As we’ve explored in this beginner’s guide to making scented soy wax candles, the process is all about experimentation and fun. We’ve covered the basics of soy wax vs paraffin, and dived into the world of candle fragrance blending techniques. By following these simple steps and tips, you’ll be well on your way to creating your own unique, high-quality scented soy wax candles that will make your home smell amazing and provide a warm, cozy ambiance.
So, don’t be afraid to get creative and try new things – the possibilities are endless! With a little practice and patience, you’ll be crafting beautiful, fragrant candles like a pro. Remember, the joy of making scented soy wax candles is in the process, not just the end result. Happy crafting, and I hope you enjoy the warm glow of your newfound hobby!
Frequently Asked Questions
What is the ideal melting point for soy wax when making scented candles?
For scented soy wax candles, you’ll want to aim for a melting point between 120°F to 140°F (49°C to 60°C). This range allows for a smooth, even melt and helps prevent hot spots that can affect the fragrance throw.
How do I ensure that my scented soy wax candles have a consistent and strong fragrance throw?
To achieve a consistent and strong fragrance throw, make sure to use high-quality fragrance oils and follow the recommended usage rates. Also, ensure your melted wax reaches the ideal temperature for fragrance absorption, usually around 160-180°F. This will help your scented soy wax candles fill the room with a beautiful, lasting aroma.
Can I use essential oils as a substitute for fragrance oils in my soy wax candle recipes?
While essential oils can be used in soy wax candles, they aren’t always the best substitute for fragrance oils. Essential oils are more potent and can be quite expensive, but they also have a more delicate scent throw. If you do decide to use them, start with a small amount and test the scent throw before pouring the entire candle.