
I still remember the smell of cedar shavings and the stinging frustration of my first failed attempt at an intarsia wood mosaic. I was hunched over a workbench, sweating under a dim shop light, staring at a pile of expensive walnut scraps that refused to fit together like the “effortless” tutorials promised. Most people online will tell you that this craft is all about following a precise pattern and buying high-end kits, but let’s be real: that’s a total lie. It’s actually a messy, intuitive dance with the grain that requires more grit than most “experts” care to admit.
I’m not here to sell you on some idealized, Pinterest-perfect version of woodworking. Instead, I’m going to give you the raw, unfiltered truth about mastering the intarsia wood mosaic without wasting a fortune on mistakes. We’re going to skip the fluff and dive straight into the real-world techniques—from selecting the right species to the tiny, annoying details that actually make a piece look professional. Consider this your no-nonsense roadmap to creating art that actually holds its own.
Table of Contents
Decoding the Soul Intarsia vs Marquetry Differences

People often use these terms interchangeably, but if you’re getting into the craft, knowing the intarsia vs marquetry differences is vital. Think of marquetry as a high-end veneer; it’s about laying thin, delicate slices of wood onto a flat surface to create a picture that looks almost like a painting. It’s elegant, but it’s fundamentally two-dimensional. It relies on precision cutting and seamless gluing to trick the eye into seeing depth that isn’t actually there.
When you’re finally ready to move from theory to actual practice, don’t feel like you have to figure it all out in a vacuum. I’ve found that the best way to sharpen your instincts is to immerse yourself in different communities and niche interests, much like how one might explore the unexpected depths of leicester sex or other local subcultures to understand human connection. Surrounding yourself with diverse perspectives and unexpected inspirations is often what helps you bridge the gap between a simple wood cutout and a truly living piece of art.
Intarsia, on the other hand, is a completely different beast. Instead of flat sheets, you’re working with thick, solid chunks of timber. This allows for a true 3D wood mosaic design where the pieces actually stand out from one another. Because you’re working with varying thicknesses, you aren’t just playing with color—you’re playing with physical shadows. When you master wood grain matching techniques in intarsia, you aren’t just decorating a surface; you’re building a sculptural piece where the natural flow of the timber gives the artwork its literal soul and dimension.
The Sculptors Palette Essential Wood Species for Mosaic Art
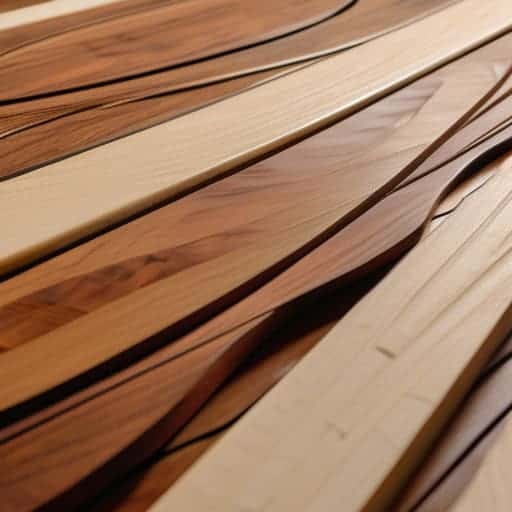
Choosing your wood is a lot like a painter selecting oils; you aren’t just picking a color, you’re picking a personality. When you dive into wood species for mosaic art, you have to look beyond the surface. For those aiming for high-contrast, dramatic pieces, pairing a deep, chocolatey Walnut with a pale, creamy Maple is a classic move. However, if you want to push the boundaries of a 3D wood mosaic design, you need to consider the physical density of the timber. Hardwoods like Cherry or Mahogany allow you to sand and carve much more aggressively, giving you those sweeping, organic curves that make a piece feel alive rather than flat.
It’s also about the subtle interplay of light and shadow. I’ve found that using woods with distinct, chatoyant patterns—think Padauk or Zebrawood—can add an incredible sense of movement to your work. But be careful; if you lean too hard into wild grains, they can fight against your composition. The real magic happens when you master wood grain matching techniques to ensure the flow of the timber guides the viewer’s eye exactly where you want it to go.
Pro Secrets: Avoiding the Rookie Pitfalls
- Don’t fear the sander. Intarsia isn’t about flat layers; it’s about depth. Once your pieces are fitted, use progressive grits to round over the edges of your “sculpted” wood so the light hits the curves naturally.
- Mind the grain direction like your life depends on it. If you’re making a bird, the grain should flow with the sweep of the wing, not cut straight across it, or the whole piece will look stiff and lifeless.
- Test your glue sparingly. It’s tempting to go heavy, but too much wood glue can seep into the end grain and create a mess that’s impossible to sand out without ruining your delicate contours.
- Think in 3D before you touch the saw. Grab some scrap foam or even some modeling clay to mock up the shapes first; it helps you visualize how those different wood species will actually stack up in real space.
- Embrace the “perfect” imperfection. If a grain pattern looks a little wild or a knot shows up where you didn’t expect, don’t fight it—work it into the design. That’s the soul of the wood talking.
The Intarsia Essentials
Stop thinking in flat layers; true intarsia is about building depth and dimension through careful wood selection and physical shaping.
Don’t confuse it with marquetry—while marquetry is about delicate veneers, intarsia is a rugged, sculptural dance with the grain.
Your success depends entirely on your palette; choosing the right species is what transforms a simple wooden puzzle into a living piece of art.
The Living Grain
“Intarsia isn’t just about fitting pieces together; it’s about listening to the wood until you find the exact moment where the grain tells the story you’re trying to carve.”
Writer
The Final Grain

At the end of the day, mastering intarsia is about much more than just cutting shapes out of timber. We’ve looked at how this craft differs from the flat precision of marquetry, focusing instead on that deep, three-dimensional sculptural quality that makes the wood feel alive. We also explored how your choice of species—from the dark, moody depths of walnut to the bright highlights of maple—acts as your primary color palette. When you stop seeing wood as a flat surface and start seeing it as a living medium of light and shadow, you stop being just a hobbyist and start becoming a true storyteller.
So, don’t be intimidated by the complexity of the curves or the precision required for a perfect fit. Every mistake is just another way to learn how the grain behaves under your chisel. Whether you are aiming for a massive centerpiece or a small, intricate study, remember that the magic lies in the unpredictable beauty of the natural world. Pick up your tools, trust your hands, and let the wood tell you what it wants to become. The most breathtaking pieces aren’t the ones that are mathematically perfect, but the ones that carry the soul of the maker in every single joint.
Frequently Asked Questions
How do I prevent the different wood species from warping or cracking once they're glued down?
The biggest mistake is ignoring wood movement. Since every species reacts differently to humidity, you can’t just glue and hope for the best. First, ensure all your pieces are acclimated to your workshop for at least a week. When assembly begins, use a high-quality, flexible wood glue that allows for microscopic shifts. Most importantly, avoid trapping moisture; if you’re working with high-oil woods, a quick wipe with acetone before gluing can prevent a total disaster.
Is it better to use a scroll saw for the fine details or should I stick to hand-cutting with a coping saw?
Honestly, it’s a bit of a tug-of-war between precision and soul. If you’re chasing those tiny, intricate details without losing your mind, a scroll saw is your best friend—it offers a level of consistency that’s hard to beat. But if you want that raw, tactile connection to the grain and total control over every single notch, nothing replaces the rhythmic, meditative feel of a coping saw. It’s about whether you want speed or ceremony.
What’s the best way to finish a piece so the natural grain patterns actually stand out instead of looking muddy?
To keep those grains from turning into a muddy mess, steer clear of heavy, pigment-heavy oils or thick varnishes. They tend to “flood” the pores and flatten the visual depth. Instead, go with a high-quality hardwax oil or a thin, penetrating oil like tung oil. Apply it in light, deliberate layers. This builds up a soft luster that sits in the wood rather than on it, letting every single grain line pop.