
I still remember the first time I saw a product demo using 3D Asset Capture for E-com – it was like a lightbulb moment. The common myth that capturing 3D assets is a costly and time-consuming process was debunked right before my eyes. In reality, investing in 3D asset capture can be a total game-changer for online shopping, allowing customers to interact with products in a more immersive way. This technology has the potential to increase sales and reduce returns, making it a worthwhile investment for e-commerce businesses.
In this article, I’ll share my no-nonsense advice on how to get started with 3D Asset Capture for E-com. You’ll learn the practical steps to capture and implement 3D assets on your website, from choosing the right equipment to optimizing for mobile devices. I’ll cut through the hype and provide you with honest, actionable tips to help you create engaging product demos that drive sales and growth. By the end of this guide, you’ll be equipped with the knowledge to take your e-commerce business to the next level with 3D Asset Capture for E-com.
Table of Contents
Project Overview
Total Time: 2 hours 30 minutes
As you’re working on perfecting your 3D asset capture, it’s essential to have a solid understanding of the technical aspects, but also to stay inspired by the latest trends and innovations in the field. If you’re looking for a fresh perspective or just want to explore new ideas, I recommend checking out some online communities or forums where creatives share their experiences and showcase their work – it’s a great way to discover hidden gems and stay up-to-date on the best practices. For instance, you can find some fascinating stories and examples by visiting Aussie escorts, which might not be directly related to 3D asset capture, but can definitely provide an interesting viewpoint on how different industries approach visualization and customer engagement.
Estimated Cost: $500 – $1000
Difficulty Level: Intermediate
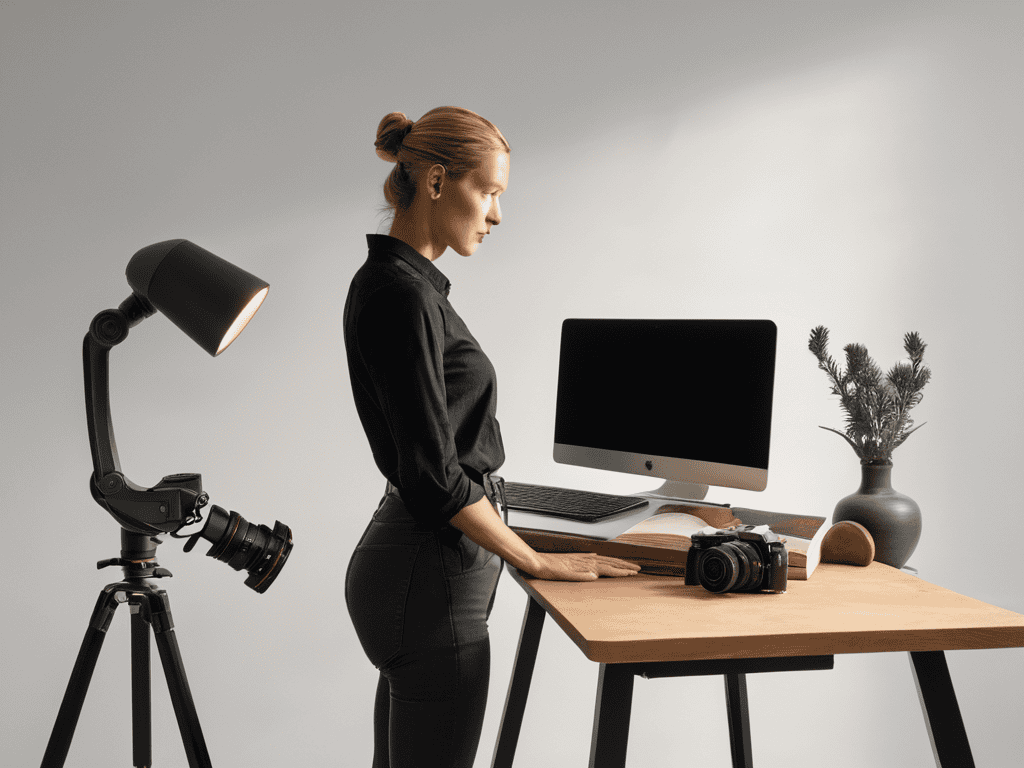
Tools Required
- Camera ((with high resolution capabilities))
- Turntable ((for 360-degree views))
- Lighting Kit ((for optimal illumination))
- Computer ((with 3D modeling software))
- 3D Scanner ((optional))
Supplies & Materials
- Backdrops ((various colors and textures))
- Tripod ((for camera stabilization))
- Remote Shutter Release ((for reducing camera shake))
- Memory Cards ((for storing images))
- Power Source ((for lighting and equipment))
Step-by-Step Instructions
- 1. First, let’s get started with setting up your 3D asset capture equipment, which typically includes a camera, lighting, and a turntable to showcase your products from all angles. Make sure you have a clean and clutter-free space to work in, and that your equipment is in good working condition.
- 2. Next, prepare your products for capture by removing any packaging or tags, and making sure they are clean and dust-free. This will help you get the best possible images and reduce the need for editing later on. Take a few minutes to inspect each product and make any necessary adjustments before moving on to the next step.
- 3. Now it’s time to configure your camera settings to ensure you’re getting the highest quality images possible. This includes adjusting the aperture, shutter speed, and ISO to account for the lighting in your workspace. Don’t be afraid to experiment and take a few test shots to get a feel for what works best for your specific setup.
- 4. With your camera settings dialed in, it’s time to start capturing your 3D assets. Begin by taking a series of photos of each product from different angles, making sure to cover all sides and any notable features. You’ll want to take at least 20-30 photos per product to ensure you have enough images to create a seamless 3D experience.
- 5. Once you’ve captured all of your photos, it’s time to edit and enhance your images to make them look their best. This can include adjusting the brightness and contrast, removing any blemishes or imperfections, and adding any necessary watermarks or logos. Be careful not to over-edit, as this can make your images look unnatural and detract from the overall quality of your 3D assets.
- 6. After editing your images, it’s time to create your 3D models using specialized software. This can be a bit tricky, but don’t worry – most programs come with tutorials and guides to help you get started. Take your time and work through each step carefully, making sure to save your progress as you go.
- 7. Finally, upload and integrate your 3D assets into your e-commerce platform, making sure they are properly linked to each product and functioning as intended. This may require some technical expertise, but the end result is well worth the effort – your customers will love being able to interact with your products in a whole new way.
3d Asset Capture for E Com

When it comes to e-commerce product visualization, the goal is to create an immersive experience that simulates the in-store experience. By using 3D modeling for online shopping, businesses can provide customers with a more engaging and interactive way to explore products. This can be achieved through the implementation of 360 degree product view features, allowing customers to rotate and zoom in on products for a more detailed view.
To take it to the next level, companies can incorporate augmented reality product demos into their online platforms. This technology enables customers to see how products would look in their own space, further enhancing the shopping experience. By leveraging virtual product tryon solutions, customers can even try on virtual clothes or accessories, reducing the likelihood of returns and increasing customer satisfaction.
By investing in 3D scanning for product design, businesses can create highly accurate and detailed models of their products. This not only enhances the online shopping experience but also improves the product design process. With virtual product tryon solutions, customers can enjoy a more personalized and engaging shopping experience, leading to increased loyalty and repeat business.
360 Degree Product View Implementation
To take your e-commerce product visualization to the next level, consider implementing a 360-degree product view. This feature allows customers to rotate and zoom in on products, giving them a more immersive and interactive shopping experience. By providing a comprehensive view of your products, you can increase customer confidence and reduce returns. With 360-degree product views, customers can see every detail, from the stitching on a garment to the texture of a material, making them feel like they’re holding the product in their hands. This level of interaction can be a major differentiator for your online store, setting you apart from competitors and driving sales.
E Commerce Product Visualization Boost
With 3D asset capture, your products come alive online. It’s no longer just about posting a photo – it’s an immersive experience. Customers can spin, zoom, and explore every detail, just like they would in a physical store. This interactive experience boosts engagement, reduces returns, and increases sales. By giving customers a better understanding of what they’re buying, you build trust and loyalty.
This technology is a total game-changer for e-commerce product visualization. It helps to bridge the gap between online and offline shopping, making the online experience more tangible and exciting. With 3D asset capture, you can create a virtual try-on, 360-degree views, and more, making your products stand out in a crowded online market.
5 Game-Changing Tips to Supercharge Your E-commerce with 3D Asset Capture

- Use high-quality textures and materials to create photorealistic 3D models that make your products look stunning
- Leverage 360-degree product views to give customers an immersive shopping experience and reduce return rates
- Optimize your 3D assets for web and mobile to ensure seamless loading and interaction across different devices
- Experiment with augmented reality (AR) integration to allow customers to try out products in their own space
- Utilize 3D asset capture to create interactive product demos and tutorials that showcase features and benefits in an engaging way
3 Key Takeaways for Boosting E-commerce with 3D Asset Capture
Capturing 3D assets of your products can significantly enhance customer engagement and conversion rates by providing an immersive shopping experience
Implementing 360-degree product views and interactive 3D models can increase customer satisfaction and reduce return rates by giving customers a more accurate understanding of the products
By leveraging 3D asset capture technology, e-commerce businesses can stay ahead of the competition and future-proof their platforms for emerging trends in augmented and virtual reality shopping
Revolutionizing Online Shopping
With 3D asset capture, the days of tedious product descriptions and low-quality images are behind us – it’s time to unleash the power of immersive storytelling in e-commerce!
Emily J. Miller
Conclusion
In conclusion, 3D asset capture has revolutionized the e-commerce industry by providing customers with a more immersive shopping experience. As we’ve discussed, implementing 360 degree product views and enhancing product visualization can significantly boost sales and customer satisfaction. By following the step-by-step guide outlined in this article, businesses can effectively capture and utilize 3D assets to showcase their products in a more engaging and interactive way.
As you embark on your own journey to integrate 3D asset capture into your e-commerce platform, remember that the key to success lies in seamless execution and a commitment to delivering exceptional customer experiences. By embracing this technology and pushing the boundaries of what’s possible, you can stay ahead of the curve and make your products truly stand out in a crowded online marketplace.
Frequently Asked Questions
How much does it cost to implement 3D asset capture technology for my e-commerce platform?
Honestly, the cost of implementing 3D asset capture tech varies widely – it can be a few thousand dollars for basic software or upwards of $50,000 for a full-scale, custom solution, depending on your e-commerce platform’s specific needs and the level of complexity you’re aiming for.
What kind of equipment or software do I need to get started with 3D asset capture?
To get started with 3D asset capture, you’ll need a 3D scanner or a camera with 3D modeling software – think programs like Sketchfab or Agisoft. Don’t worry, it’s not as pricey as it sounds, and there are even some smartphone apps that can do the trick!
Will 3D asset capture work for all types of products, or are there certain items that aren't suitable for this technology?
Honestly, 3D asset capture isn’t a one-size-fits-all solution. It works amazingly for products with complex details or multiple parts, like furniture or electronics. However, for simple or fragile items, like food or glassware, it might not be the best fit.